Testing is where good ideas become real products people trust. If you are figuring out how to test an app before launch, the goal is simple: prove your app is usable, reliable, secure, and ready to scale before real customers hit it with real data.
Below is a practical, founder-friendly way to test your app without turning it into a months-long detour.
What "ready to launch" actually means
Your app is ready when it meets clear launch criteria. Not when it "feels done."
A solid definition of ready usually covers four outcomes:
-
Core flows work end-to-end: A user can complete the main job your app promises, every time.
-
Data is safe: You are not leaking credentials, personal data, or payment details.
-
The app holds up under real use: It does not crash, stall, or corrupt data when multiple people use it.
-
You can support it: You have a way to track errors, handle feedback, and ship fixes fast.
If you are building your first version (an MVP (Minimum Viable Product)), set the bar as safe and valuable. You can raise the polish level after users prove the product matters.
Start with a simple pre-launch test plan (that fits in one page)
A one-page test plan keeps you focused and makes your launch predictable.
Include:
-
Target users and devices: Who you serve and what they use (iPhone, Android, desktop browser).
-
Core user journeys: The 3 to 7 actions that must work (sign up, checkout, create invoice, book appointment).
-
Risks: Anything that would seriously hurt trust (payments, login, data deletion, notifications).
-
Release gates: The "no-go" conditions that block launch.
If you are building fast with an AI app builder, this step matters even more. Speed creates options. A test plan decides which options you ship.
If you want a simple mental model for iteration speed, this breakdown of the idea-to-app workflow is useful. It matches how most founders actually build: generate, test, refine, repeat.
Build a testing workflow you can repeat
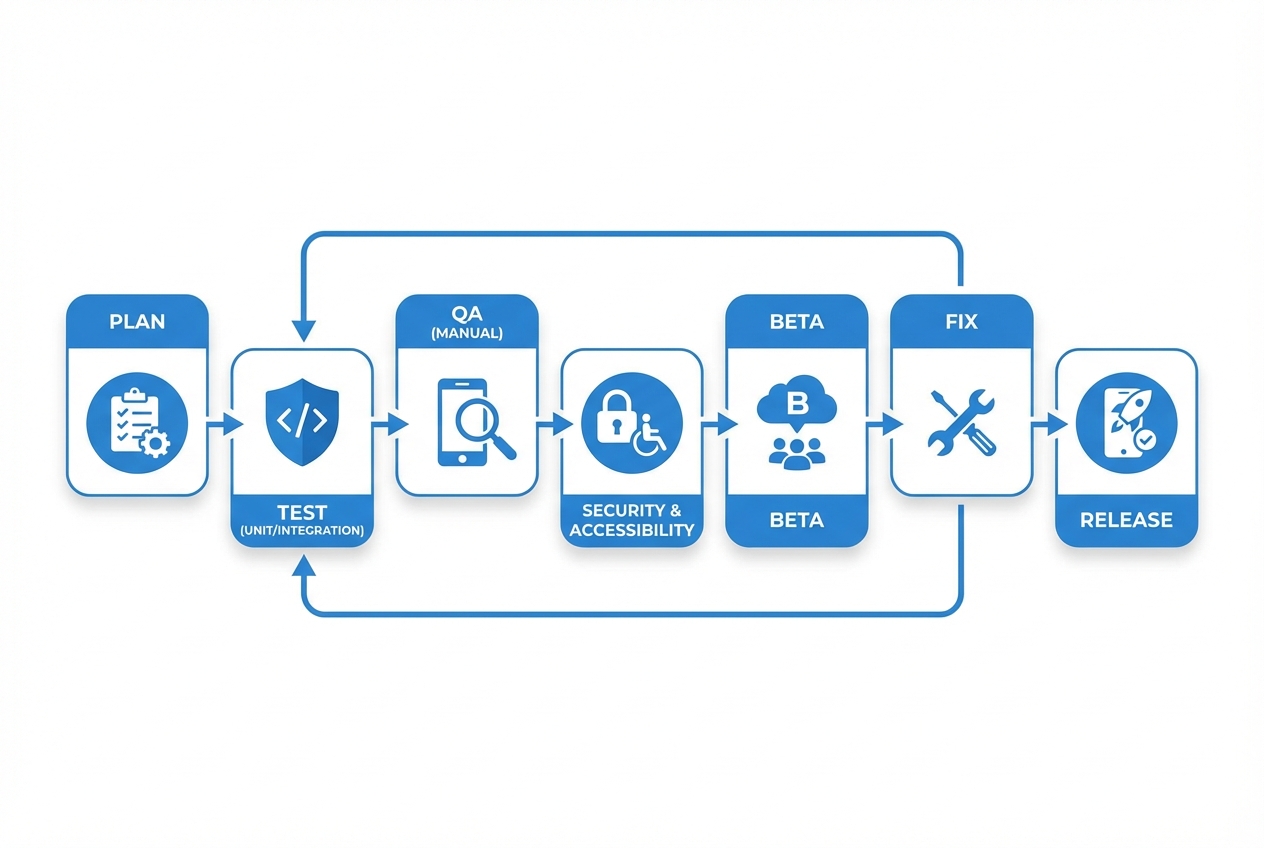
Use a loop like this to stay calm when fixes and feedback start coming in fast.
A good workflow avoids chaos when you are close to launch.
Use this loop:
- Plan what "good" looks like: Write test scenarios for each core flow.
- Test quickly (automated where possible): Catch obvious breakages early.
- Do a focused manual QA pass: QA means Quality Assurance. This is where you validate real-world behavior.
- Run security + accessibility checks: Find high-impact issues before users do.
- Beta test with real people: Validate value and clarity, not just functionality.
- Fix and re-test: No "quick patch" without re-checking the impacted flow.
- Launch with monitoring: Launch day starts the learning loop. Watch errors and feedback immediately.
This is also the easiest point to divide responsibilities. If you are solo, you still follow the same loop. You just time-box it.
Test the right things: a practical coverage map
Different tests catch different failure modes. Use this table to avoid over-testing low-value areas while missing the expensive bugs.
| Test type | What it catches | When to run it | What "pass" means |
|---|---|---|---|
| Unit tests | Logic errors in small functions | Every change | Key logic behaves as expected with edge cases |
| Integration tests | Breaks between services, database, APIs | Daily and before release | Core flows work with real dependencies |
| End-to-end tests | Full user journey failures | Before beta and before launch | Sign up to success path works in a clean environment |
| Manual QA | User experience (UX) confusion, odd device issues | Before beta and launch | A normal user can complete tasks without help |
| Performance checks | Slow screens, timeouts, heavy queries | Before beta and launch | The app stays responsive under realistic load |
| Security testing | Data leaks, authentication issues, misconfigurations | Before beta and launch | No critical risks remain unaddressed |
| Accessibility testing | Barriers for people with disabilities | Before launch | Meets your target level (often WCAG AA) |
If you can only do three: manual QA on core flows, security basics, and beta testing.
Step 1: Lock down your "core flows" and test them end-to-end
Most launch failures come from a broken primary path, not a rare edge case.
Pick your core flows and write them as plain steps. Example:
-
Sign up flow: Create account → verify email → log in → land on dashboard.
-
Payment flow: Select plan → enter card → successful purchase → invoice receipt → access unlocked.
-
Create value flow: Create the thing your app exists for (booking, invoice, report, task) → save → view later.
Then test each flow across:
-
Happy path: Everything goes right.
-
Common mistakes: Wrong password, invalid email, expired card.
-
Recovery: Reset password, retry payment, restore draft.
Step 2: Set up test environments

Staging should feel like production, but stay safely isolated from real users and real data.
Testing in production is how founders accidentally leak data or break live workflows.
Aim for:
-
Staging environment: A near-identical copy of production.
-
Seeded test data: Sample accounts, example records, and test transactions.
-
User roles: Admin, staff, customer, and any permission tiers.
Key checks:
-
Data separation: Test accounts should not appear to real customers.
-
Safe emails and notifications: Use a sandbox so you do not spam real users.
-
Payment sandbox: Use the payment provider's test mode.
Step 3: Run a focused manual QA pass
Manual QA works best when it is focused. Your job is to prove the app works for normal people.
Use a short session per core flow and take notes as you go.
Look for:
-
Clarity: Does each screen tell the user what to do next?
-
Error handling: Does the app explain how to fix the issue?
-
State issues: Refreshing, back button, opening in a new tab, returning later.
-
Form behavior: Field validation, keyboard types on mobile, copy/paste.
Bug reports that actually get fixed include:
-
Steps to reproduce: The exact clicks or taps that cause the issue.
-
Expected result: What should happen.
-
Actual result: What happened.
-
Environment: Device model, operating system, browser, app version.
-
Evidence: Screenshot or screen recording.
Step 4: Cover your device and browser matrix (the minimum that matters)
You do not need every device. You need the devices your buyers actually use.
Start with analytics if you have it. If you do not, use your market's defaults.
| Category | Minimum recommendation | Why it matters |
|---|---|---|
| iOS | Current iOS + one older major version | Real users lag updates |
| Android | A mid-range Android + a newer flagship | Performance and UI variance |
| Browsers | Chrome, Safari, Edge | Layout and input differences |
| Screen sizes | Small phone + large phone + laptop | Responsive layout breaks show up here |
If you are launching a web app first, Safari on iPhone is often where "it looked fine on my laptop" goes to die. Test it early.
Step 5: Validate performance before real users feel it
Performance problems show up as "the app is buggy." Users rarely label it as performance.
Check:
-
Load time on key screens: Dashboard, search, checkout.
-
Slow queries: Large lists, filters, exports.
-
Concurrent use: Two to five people using the app at once can reveal locking and race issues.
Practical approach:
-
Record baseline: How fast does it feel right now?
-
Fix the worst bottleneck: Usually images, queries, or third-party scripts.
-
Re-test the same flow: Do not rely on "it seems better."
Step 6: Run pre-launch security checks
Security testing does not need to be scary, but it does need to be deliberate.
Use reputable checklists and frameworks to guide your effort:
-
OWASP Mobile Top 10: Use the OWASP Mobile Top 10 (latest risks) to sanity-check common mobile risk areas before launch.
-
NIST SSDF: Use the National Institute of Standards and Technology (NIST) Secure Software Development Framework (SSDF) to bake security into your process, not just your final week.
What to check in plain English:
-
Authentication: Login cannot be bypassed, sessions expire, password reset is safe.
-
Authorization: Users can only access their own data (no "change the ID in the URL" surprises).
-
Sensitive data: Passwords, tokens, and personal data are not logged or stored insecurely.
-
Transport security: Traffic is encrypted (HTTPS) and certificates are handled correctly.
-
Misconfiguration: Debug mode off, secrets not shipped to the client, admin endpoints protected.
If you are not confident here, get help. Security issues are reputation killers because they break trust fast.
Step 7: Test accessibility as part of product quality
Accessibility makes your app usable for more people. It also forces clearer design.
Use WCAG 2.2 as the baseline reference. WCAG means Web Content Accessibility Guidelines.
High-impact checks:
-
Keyboard support: You can navigate and activate key actions without a mouse.
-
Color contrast: Text is readable in real lighting conditions.
-
Labels and instructions: Form fields have clear labels, not just placeholder text.
-
Focus state: Users can see where they are on the page.
Do a quick pass with an automated checker, then manually test your main flows. Automation catches patterns. Humans catch real-world friction.
Step 8: Beta test with real users
Beta testing is where you learn what you missed and which parts of your app confuse people.
How to run a beta that gives you useful insight:
-
Pick a small, specific tester group: Start with people close to your target buyer.
-
Give them missions: "Create an account, do X, then try Y."
-
Ask for one score and one comment: "What was the hardest part?"
-
Watch where they hesitate: Confusion is your product backlog.
Bug feedback is great. Confusion feedback is gold.
Step 9: Do a pre-launch store and compliance pass
A surprising number of launches stall on non-code issues.
Check:
-
App name and metadata: Clear description, keywords, and correct category.
-
Screenshots and preview media: Match what the app does today.
-
Privacy policy and data disclosures: Accurate and visible.
-
Support contact: Email or support page ready.
If your app includes payments, subscriptions, or user-generated content, double-check the platform requirements early. Do not wait until the final day.
Step 10: Run a "go/no-go" review you will actually follow
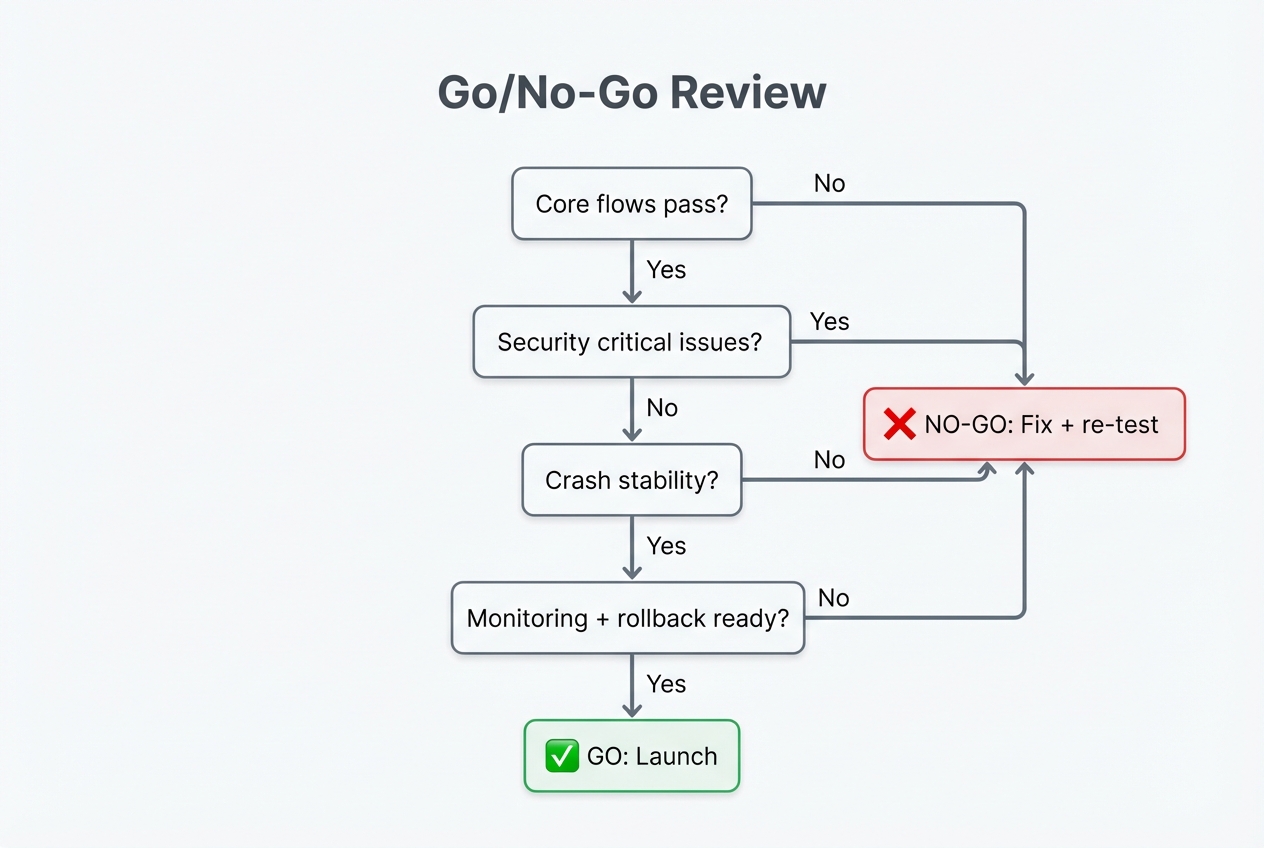
Decide the launch blockers in advance, then follow the decision even when you feel pressure to ship.
This is your founder safety rail. You decide in advance what blocks launch.
Use a simple table and be strict about the "no-go" items.
| Area | Go when… | No-go when… |
|---|---|---|
| Core flows | All core flows pass on target devices | Any core flow fails or loses data |
| Security | No known critical auth/data issues remain | Users can access other users' data or bypass auth |
| Crash stability | No repeatable crash in core flows | Any repeatable crash blocks the main job |
| Payments | Test mode and live mode are validated | Charges fail, duplicate, or receipts break |
| Accessibility | Main flows are usable and readable | Core actions are impossible with keyboard/screen reader |
| Support | You can capture bugs and respond fast | No monitoring, no owner, no rollback plan |
If you are building on a tight timeline, a strong move is to ship a smaller launch with fewer features, but higher confidence. Your users forgive missing features. They rarely forgive broken basics.
Where QuantumByte fits
If you are building a customer-facing app as a business owner, two problems show up late in the game:
-
Speed to a real product: You need something usable fast so you can validate demand.
-
Engineering for the hard parts: You still need real development help once you hit edge cases (permissions, integrations, scaling, security hardening).
This is the gap QuantumByte is designed to cover. You can build quickly with AI, then bring in an in-house team to harden the parts that need deeper engineering.
If you want to see what deliverables and launch support look like, explore the plug-and-play option. If you are building a deeper operational system, Enterprise is the better fit.
Launch with confidence
You now have a complete, repeatable approach for how to test an app before launch:
-
Define launch readiness: Set measurable criteria for what "ready" means, then use it to keep decisions clean.
-
Prove core flows end-to-end: Test the main user journeys on the devices and browsers your buyers actually use.
-
Combine manual and automated tests: Use automation to catch repeat breaks, then rely on manual QA for real-world behavior.
-
Validate performance early: Find slow screens and heavy queries before users start calling your app "buggy."
-
Run security checks before beta: Confirm authentication, authorization, and data handling are solid before you widen access.
-
Test accessibility as part of quality: Make sure key flows work with keyboard navigation and readable contrast.
-
Structure beta feedback: Give testers missions and ask for friction, not just "bugs."
-
Do a store and compliance pass: Make sure privacy, metadata, and support details are ready so release day does not stall.
-
Hold a strict go/no-go review: Pre-decide what blocks launch, then follow it even when you are eager to ship.
A calm launch comes from deliberate testing and a clear go/no-go bar. Do the work once, then reuse the workflow every time you ship.
Frequently Asked Questions
How long should app testing take before launch?
For a small MVP, plan for at least a few focused cycles: test, fix, re-test. The exact timeline depends on complexity, but you should always leave enough time for one full regression pass, meaning you re-test the core flows after fixes.
What is the minimum testing to launch an MVP?
At minimum, test your core user journeys end-to-end on your most common devices, run basic security checks around authentication and authorization, and beta test with real users. If payments are involved, treat payment flows as launch-blocking.
What is regression testing?
Regression testing means re-running key tests after you make changes to confirm you did not break something that used to work. It is most valuable right before launch, when fixes are coming in fast.
How do I beta test an iOS app?
Use Apple TestFlight to distribute a build to internal and external testers, collect feedback, and review crash reports.
How do I beta test an Android app?
Use Google Play Console testing tracks. Start with internal testing for quick checks, then expand to closed or open testing for wider feedback.
What are the most common reasons apps fail at launch?
The most common launch failures are broken core flows and authentication or permission bugs. Apps also fail when edge cases show up on real devices, when there is no monitoring or support path, and when onboarding is unclear even though the product technically works.